
Can you believe it? The day has finally come. Footing #1 was poured, Oh, wait, what's that you say? Footing #2 was poured too. Hot damn!!! It was a very busy weekend but major progress was made at Plan473.

With all the excitement on Saturday, yet another picture of the water collected in the holes was not taken. You just have to believe me when I say five wet/dry vacuum cleaner buckets were collected at a four-gallon capacity. It is just too bad the water was salty. Oh so salty. Crystal clear salt water. Ugh. But wait I am past that remember.

Collecting water was simple. Stick the hose in, turn on the vac, turn off when the pump cycles changes, empty bucket, repeat as needed. The only difficult step was making sure not to let the hose suck in dirt or rocks from the bottom. Easy enough until the lid was removed from the first fill up and this is what greeted me. A bloated, drowned tree frog. Boo-hoo-hoo. There is nothing sadder than drowned animals. Once way back in college, when I was a lifeguard at a summer camp, I found a tiny bunny swimming laps in the pool. The bunny was so worn out when removed it just stayed on my palm where it's little heart could be felt going pitter patter at super sonic speeds. Every morning afterward I was always prepared for drowned critters. Fortunately, the only thing ever discovered were beetles, scorpions, and spiders. Being the frog was already dead lessened the stress but it was still sad all the same. I mean maybe later in the day the stress could have been handled better but at this hour of the morning, it was just too much. Yes, a tear or two was shed for the loss.

Once the water was removed, a formboard was created to secure the concrete cardboard tube, or more professionally known as Sonotube. This keeps the tube from knocked off center while concrete is poured around the inner re-bar cage.

Spreading the distance of the hole and secured in place with pickets and screws, it also allows the tamper something to stand on since the hole is 3'x3' in diameter.

Next, in the process was attaching chairs to the re-bar mat. Chairs are used to place the mat a certain distance from the bottom of the hole and help to ensure the mat is level. If one side of the mat is not high enough, add more rocks. Too high, remove rocks. Available in several heights, these chairs are 3" in length.

Each mat received 6-8 chairs each. The chairs are made of plastic and are designed to pop in place.
Yup, they are easy to snap in place all right. They are also easy to snap broken too. The second chair attached to the mat broke. Snap.

Once chairs were snapped in place, the mat was laid into the hole to level. ***On a side note, see the water in the hole? This water seeped in less than an hour. Before concrete was poured, water was vacuumed out again.*** Snap-snap. Two more chairs broke.

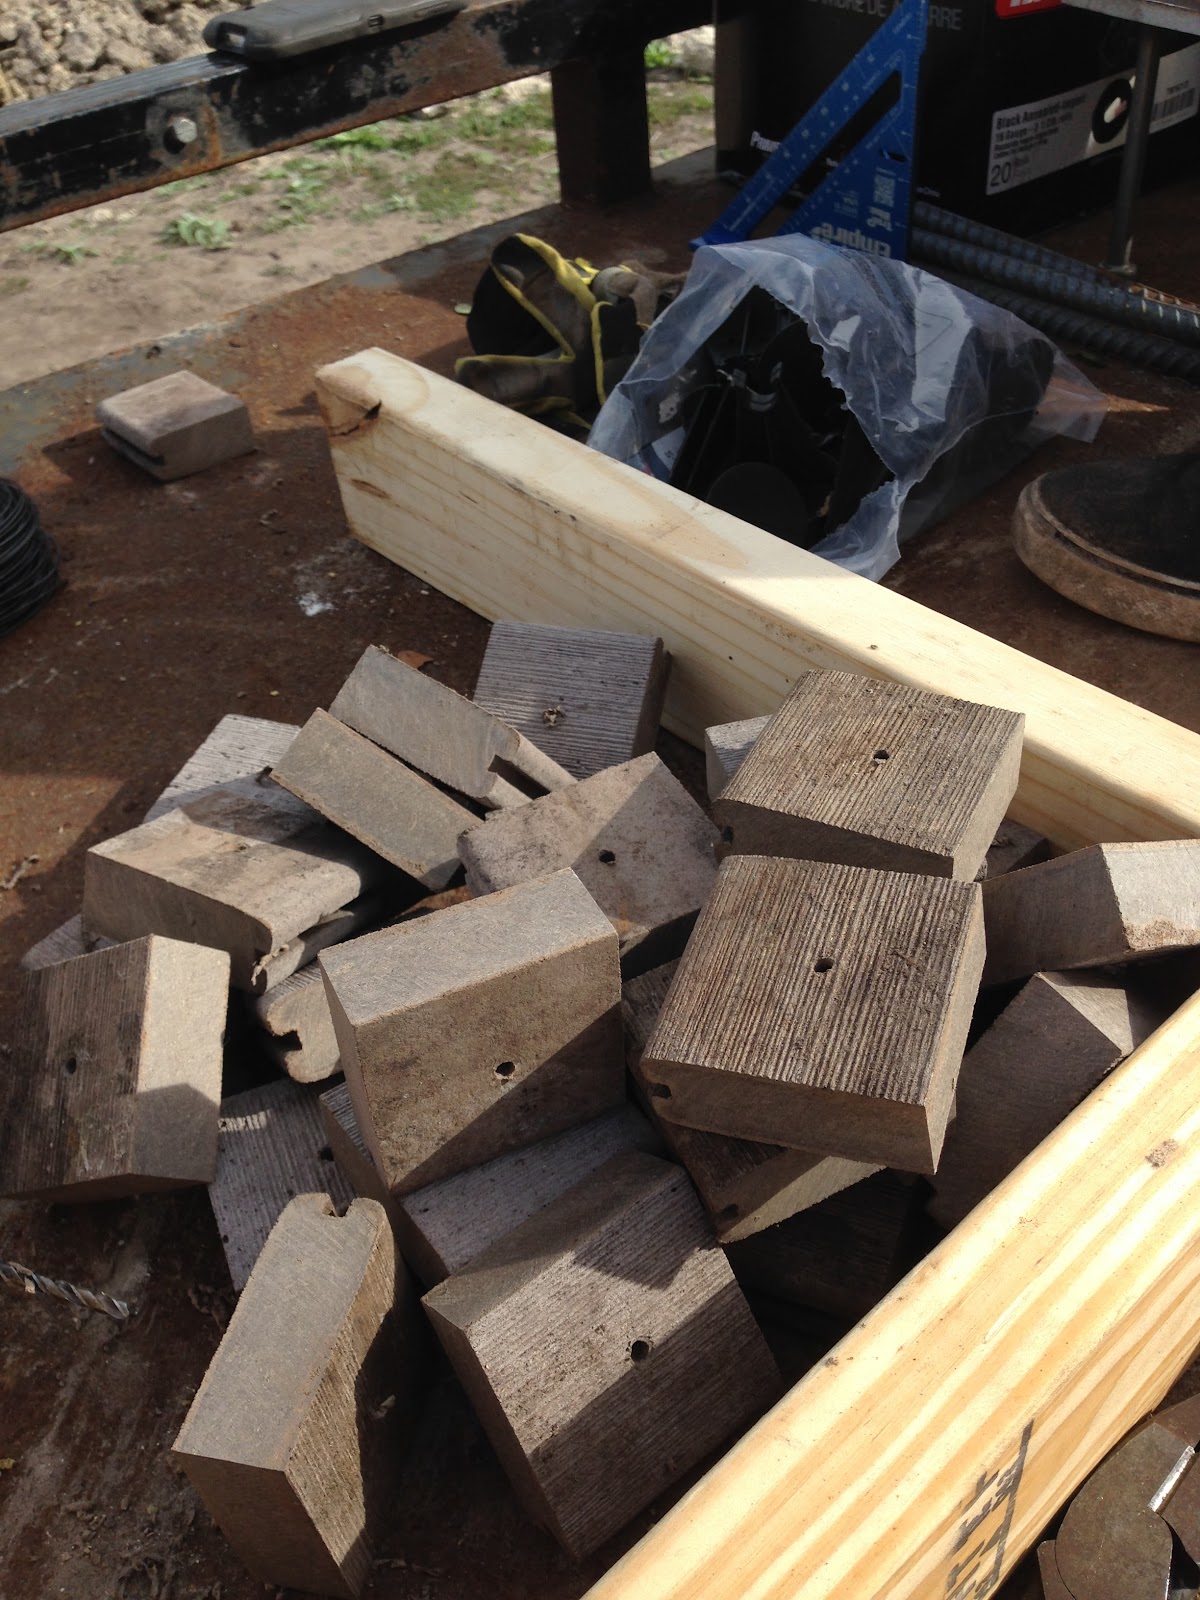
So uh-huh, two more chairs broke. Chairs had to be re-designed. There was no way the chairs were gonna be able to handle concrete being poured much less handling the arrangement and attachment of the re-bar tubing without more breakage. After some quick research, thank you Google, it was decided to use the recycled, pressed, plastic decking. Yeah, our first use from the trash collected way back in June.


Cutting was easy with the use of the skill saw guard. Never having used the guard before, I am amazed at how well it works. Each chair block is 3"x3" and is three blocks tall. That is a lot of squares to cut but since the material was free and easy to cut, the process went quickly. Then because there were all these blocks to play with, I did. One is never too old to play with blocks. Seriously! If you don't believe me, Google it. Study and study has been conducted by both physcologists and teachers alike.

Pilot holes were drilled into two out of three squares. While the material is soft, it is not easy to screw together. One square received a hole fit just right for the diameter of the screw. The second square received a much smaller hole. Why smaller on the second hole? The hole was just big enough to allow the tip of the screw to enter easily enough but not be wobbly. Wanted the blocks to stay snug and not waller out.


Two things were observed after drilling the hole. One: the shavings. Shavings on the drill were so pretty. Shavings, when piled up, were soft. Odd right, it is plastic remember. Shavings should have been brittle and sharp. But they were almost papery in texture. Two: difference in driller personalities. "Hello, my name is OCD". Yes, ok. Chill. I know that I am OCD. Fairly sure you should know by that about me by now too. But in case you have your doubts, let the pictures rest the case.
Picture One: The Planner. Doesn't this just make you want to run screaming into the hills? At least it makes you want to pull your hair out a little bit right? Ok, how about grind your teeth? Something, please. It has to do something to you, right?

Picture Two: Me, OCD. Ahh, doesn't this bring a sense of calm to you? So orderly and contained. Let us take a moment to enjoy this zenness......... What a way to calm the nerves and bring about a sense of completion.


Now, tell me you don't feel refreshed. More holes were drilled into 1/3 of the blocks allowing bailing wire to be inserted. This wire then attaches the blocks to the re-bar mat. The result is a mat full of wire ties sticking out all over the place.

But the results were worth it. The mat sits nicely in the hole, is adjustable, and can withstand human wieght without bending or breaking.


Once mats were in place three inches above the bottom of the hole, four re-bar L bars were attached to the re-bar cages. The L bars allow the cages to be secured to the mat.


Once in place, cages are centered within the hole and checked for levelness. It is MOST important that the cage remain centered on the mat and within the hole. Cages not centered will affect the load bearing capacity of the shop.

Formboards were placed around re-bar cage and secured into place using pickets and screws. The formboard needs to be secured for two reasons. One: to help ensure cage remains centered within the hold and Two: to allow the concrete tube to be screwed against.


Concrete cardboard Sonotube was measured to the correct length of 30inches, cut, and sanded to remove sharp burrs. Burrs are not an issue for concrete pouring but for when creating a smooth finish.

Once again, the tube and cage were centered using string lines. The string lines also were used to ensure the Sonotube was the correct height from the bottom.

The last step in preparation was the placement of the concrete shoot.


Then it was decided that a break was needed. Once concrete mixing begins there is no stopping. Come hell or high water, concrete mixing must be done in one solid time chunk. The kid used this time to play, play, play. He moved from free roaming helper to contract labor during the pouring of concrete. Little did he know how hard he would have to work. And because he did it, the dog had to do it too. Of course, there were some enticement cookies in the middle of the tube if she went in as a reward.

With the base plate at the ready, the fun begin. The mixing of concrete, when using a concrete mixer, was easy. If steps were followed diligently, produced results were consistent.

Step One: With the mixer on, moisten the inside to help to reduce dust.

Step Two: Add 1/2 bucket of rock. Hope you have your ear protection on because this step by itself is LOUD!!!!!!! What did you say, I can't hear. The mixing is LOUD!!!!!

Step Three: Add 1/2 bucket of cement

Step Four: Add 1/2 bucket of sand

Step Five: Mix, mix, mix
Step Six: Add 1/2 bucket of rock
Step Seven: Add 1/2 bucket of sand
Step Eight: Add 1/2 bucket of rock
Step Nine: Add water to desired consistency. Remember thicker is better.

Step Ten: Pour concrete

Step Eleven: Tamp to remove air pockets
Step Twelve: Repeat steps Two-Eleven until Sonotube is filled to desired height

Step Thirteen: Remove excess concrete


Step Fourteen: Reattach string line to ensure the concrete is at the correct height.


Step Fifteen: Insert base plate, reattach string lines ensuring correct height, and trawl concrete to smooth finish.

Step Sixteen: Wash all tools very, very, VERY well. While the cleaning process is being done, don't forget to sign your handwork. This process is very much a learned skill. My print when done with pen/pencil, crayon/marker, finger tip in sawdust is very neat and trendy. My print in concrete is the work of toddlers. Oh well, can always fill in lettering later.

Woo, wee what a day. This first picture was taken at 9:16 am and the last one was at 4:33 pm. This does not include the time it took to take out or put away the supplies from the storage boxes. As you can see in the previous picture the tractor is still out. But as in all jobs, once the hard stuff was over, energy seems to be rejuvenated and the play returns.
In recap, the first footing's total material used was: 12 - ½ buckets of cement, 24 - ½ buckets of sand, and 32 - ½ buckets of rock. The second footing and all subsequent footing total material used differed because not every hole is exactly the same size. However, the process was the same. As the saying goes, practice makes perfect. Instead of taking all day the second footing only took 1/2 the day. Who knows how fast a footing will be poured by the end of the number 10. Fast is good but done right, the first time, is better.
All in all, while very laborious, the end result was very satisfying. We, at Plan473, created the first two footings. How many people can say that? Not anyone I know. Now, just eight more to go.